
Cupcakes are a fun treat to serve at parties and events and a nice stand is a great way to present them. A stand also lets you maximize table or counter space while still offering a lot of cupcakes.
This stand is made out of cardboard and can be completely disassembled for flat storage. You can build it whatever size you need and decorate it to match any decor.
MATERIALS
- cardboard
- exacto knife
- scissors
- white glue
- contact paper or similar
- electrical tape or other decorative tape
- pencil, ruler
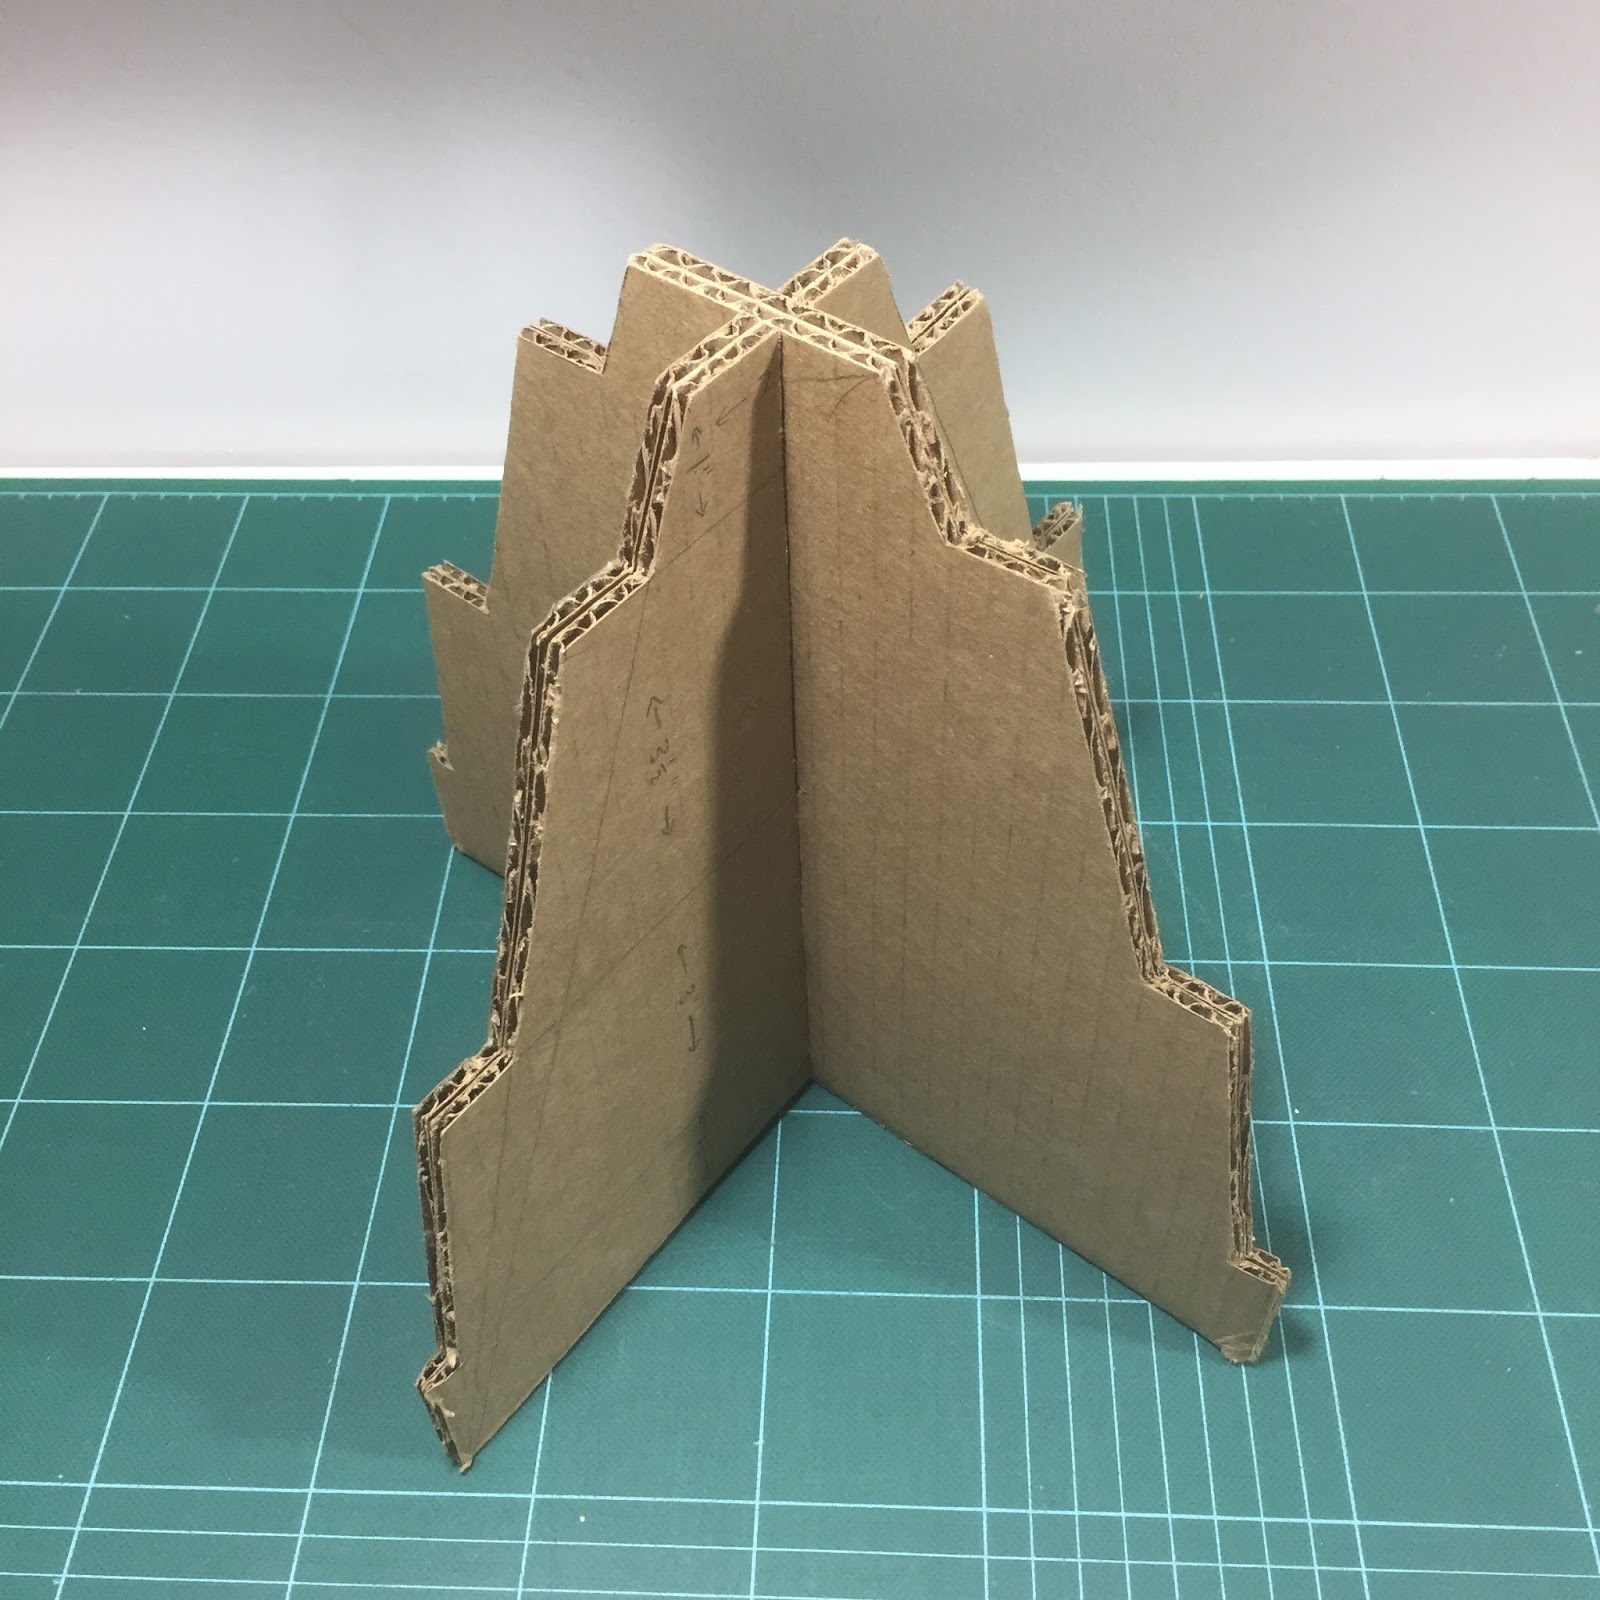
1. Start by deciding what size you want to make your stand. I didn't want mine to be to large, so for my base I cut 4 pieces of cardboard 9" high by 10" wide. White glue two pieces together and the other two pieces together and let the glue dry.
In order to easily attach the three circular platforms for the cupcakes to sit on, I angled the sides of my base and cut notches out. At the top, the base is 2" wide. The platforms will sit at 1" from the top, centered (4.5" from top/bottom), and 1.5" from the bottom.

2. Once you have your base planned out, cut out the outside edge.
Mark the center of the base both ways. On one piece, mark a space from the center to the top that is about .25" wide (the thickness of your doubled cardboard). On the other piece, mark the same space from the center to the bottom.


3. Cut out these spaces. Assemble the base to ensure the cuts are wide enough and it fits together nicely. Adjust if necessary.

4. Determine the size of your platforms. I did circles but you can use squares if you want. My circles were approximately 13", 10.5" and 8" in diameter. (I traced around some plates and a large frying pan lid to make them.) Cut two of each size.

Glue the two pieces of each size together and let the glue dry.
Mark the center of each circle. Mark an X in the center so that you can cut out the space for the platform to slide over the base and sit at the correct level. The smallest circle is the top one and the largest circle is the bottom one. Measure carefully and make sure your lines are at right-angles to each other.

5. Once you have your Xs marked, cut them out.


6. Test to make sure that your circular platforms fit onto the base and sit where they should. Adjust if necessary.


7. Now for the decorating!
I wrapped the edges of all my pieces with electrical tape first.

8. Then I covered the sides with contact paper. I did one side at a time and used my exacto knife to trim away the excess paper.


9. Cover all your pieces and trim away all the excess paper, including in your spaces for assembly.


10. Once all the pieces are covered, assemble them. Adjust any areas that are too tight by carefully trimming with the exacto knife.


DONE! Enjoy filling your stand with cupcakes!
No comments:
Post a Comment